Login to https://office.portal.com
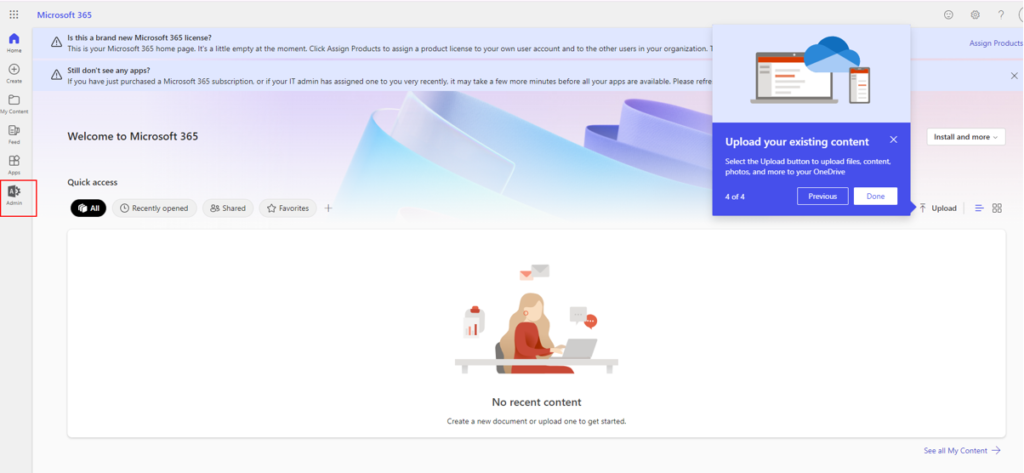
Go to the admin panel on the left.
On the left panel, go to settings > Domains . You will be prompted with the domain name.
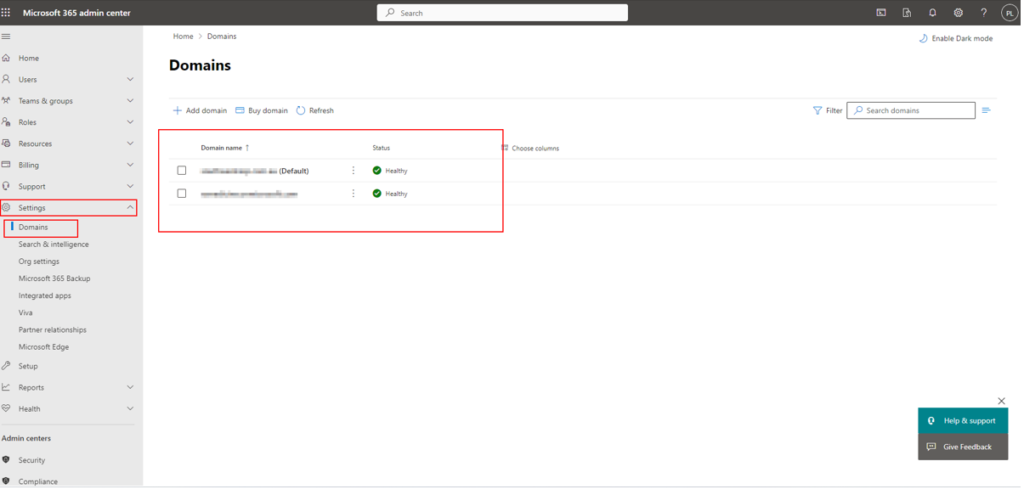
From the domain you will be presented with the following screen and then go to DNS records to check the DNS detail.

Within the admin centre, go to security and you will see the new tab open on your right.
Go to Policies & rules > Threat Policies

You can see all the threat policies presented here. The one we are interested at the moment is Email Authentication Settings.

From the email authentication settings go to DKIM.
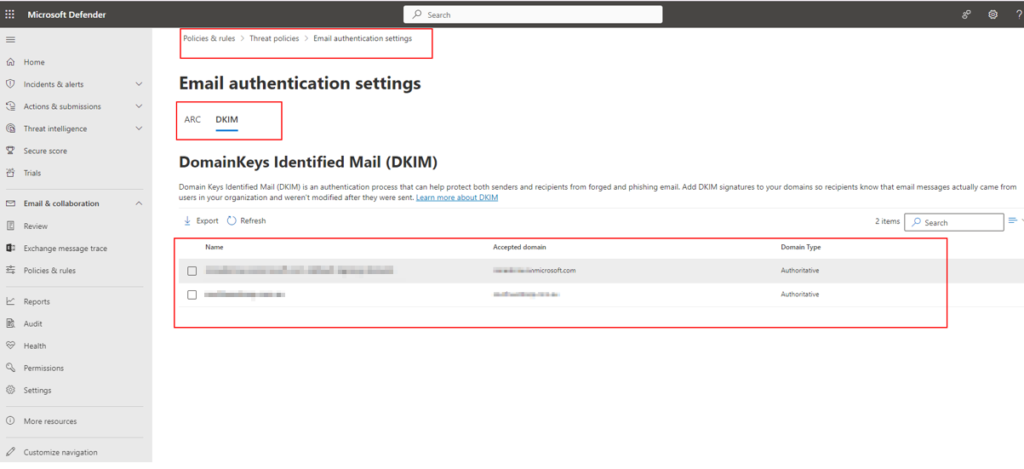
So now you will see no DKIM keys saved for this domain.

Simply create DKIM keys from the buttom ‘ Create DKIM keys” . It might take some time. After a while you will be presented with the publish CNAMEs records on your screen. Please keep a copy and save it in notepad. After copying you can close the windows.

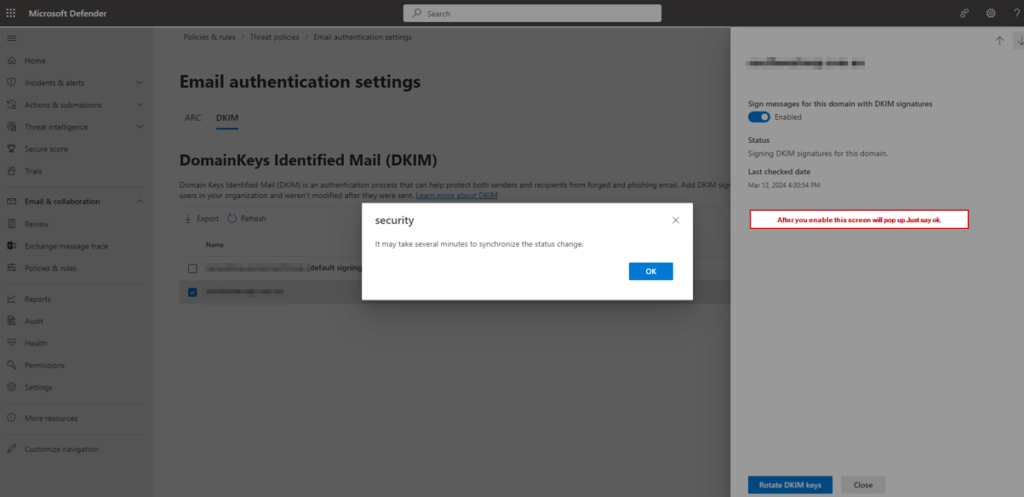
Please note if DKIM has been generated previously you will be prompted with a different pop up. Just toggle to enable.

Now go to https://mxtoolbox.com/dmarcrecordgenerator.aspx , enter your domain name and check DMARC record. You will be presented with the screen to create the DMARC record.
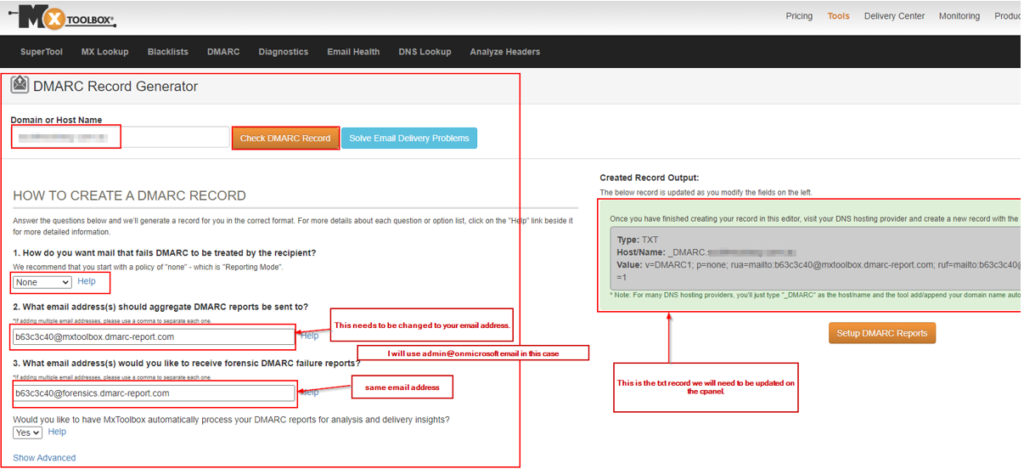
Copy the generated DMARC record and put it on the notepad.After you have generated the CNAME records, now its time you login to your cpanel. Check your hosting.
Login to your cpanel and we need to add 2 CNAME records and one txt record.
So update two CNAME records after generating the DKIM and one txt record from the DMARC record generator.
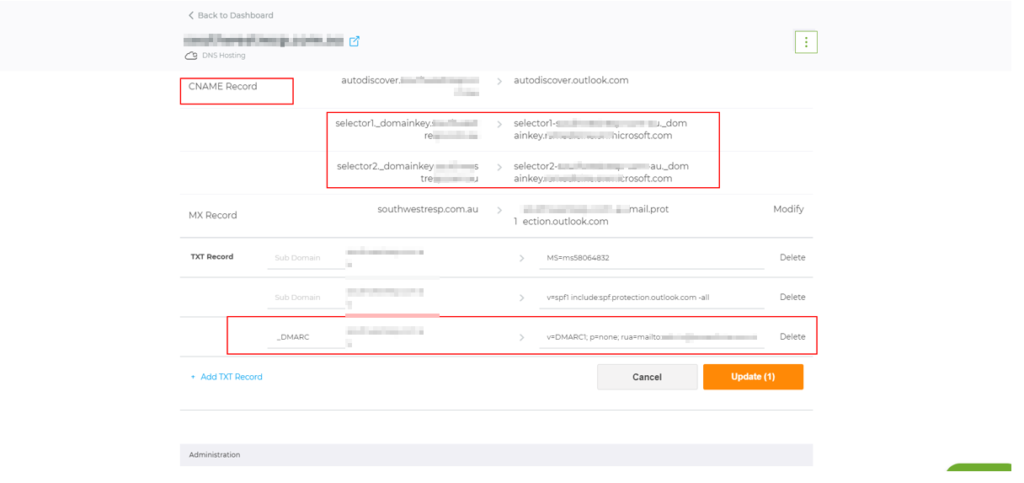
After everything is updated, it might take upto 24 hours to take effect but in general its very quick.
Now login back to the exchange portal and follow upto step 1 to 9. All you need is to toggle the disabled button and enable it.
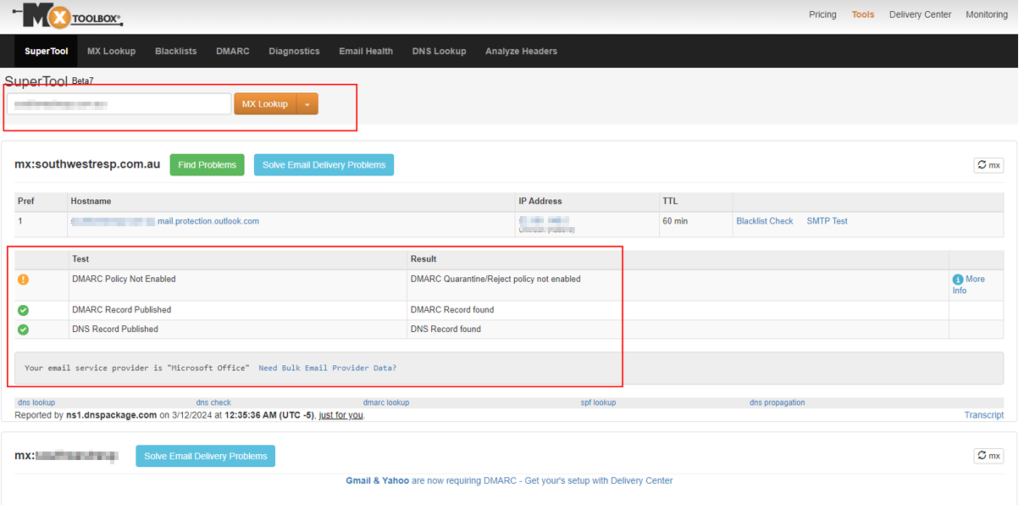
For the verification you can go back to https://mxtoolbox.com/ and enter the domain name.
